Aspia Console
Table of contents
- Purpose
- Installing
- Address book
- Computer groups
- Computers
- Import and export
- Online check
- Fast connect
- Router manage
- Hot keys
- Command line
- Environment variables
- Logs
1. Purpose
Allows you to create address books, add computers to them and group them. It also allows you to manage computers and routers.
2. Installing
Windows x86
  Run aspia-console-2.7.0-x86.msi and follow the instructions on the screen.

Windows x86_64
  Run aspia-console-2.7.0-x64.msi and follow the instructions on the screen.

MacOS X x86_64/arm64
  Open aspia-console-2.7.0-x86_64.dmg and move “Aspia Console” to “Applications”.

Linux
  sudo apt install ./aspia-console-2.7.0-x86_64.deb
3. Address book
Address book is used to perform a quick connection to computers. You can add computer groups, computers, manage connection settings to computers. Address book can be encrypted and not encrypted. When you open an encrypted address book, you must enter a password to access it. To do this, when creating an address book, select a mode with or without encryption. This setting can be changed at any time in the future in the address book properties.
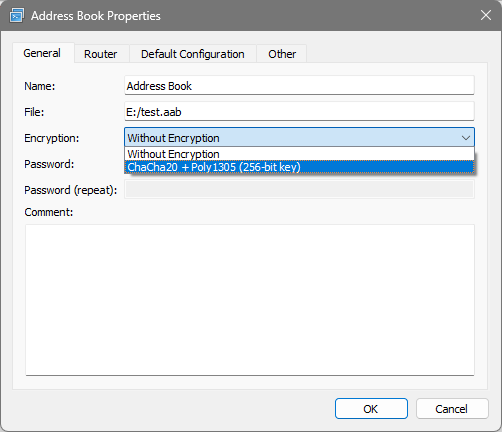
Warning! When storing passwords in your address book without encryption or with a very simple password, you need to understand that this is a potential security risk and third parties can access the management of computers from the address book.
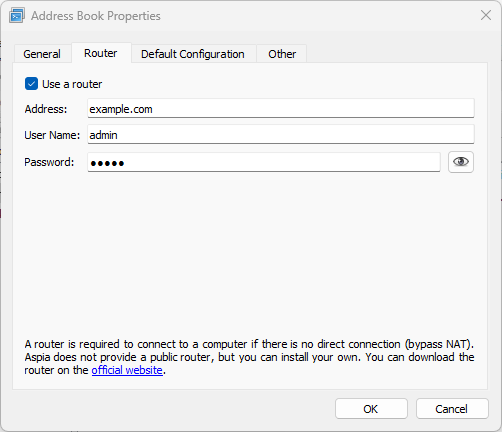
To connect using Aspie Router, go to the Router tab in the address book properties and enter the server address, username and password. Default username and password: admin/admin. Don’t forget to change the password the first time you connect to the Router.
On the Default Configuration tab, you can set default settings. When you create computer groups and computers in the address book, they can inherit from these settings (if inheritance is enabled in the properties of the computer group or computer). Using settings inheritance allows you to simplify address book management if all or most of the computers in your address book have identical settings.

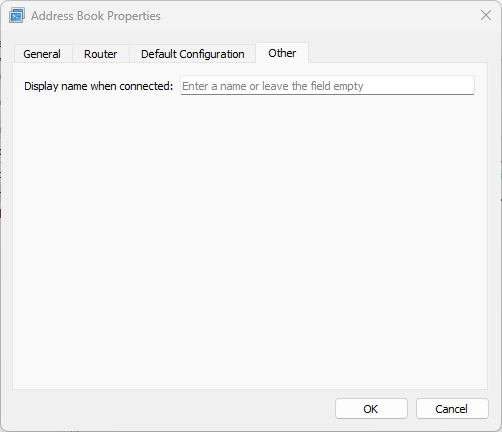
In the Other tab, you can set your display name. This name will be displayed in the Host’s notification bar and when using Text Chat.
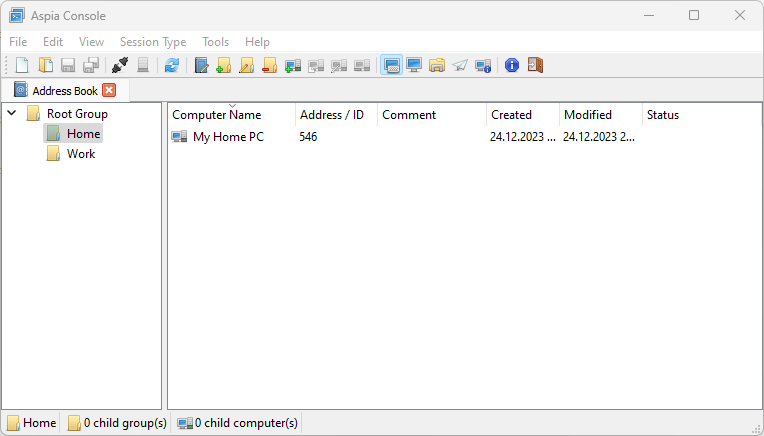
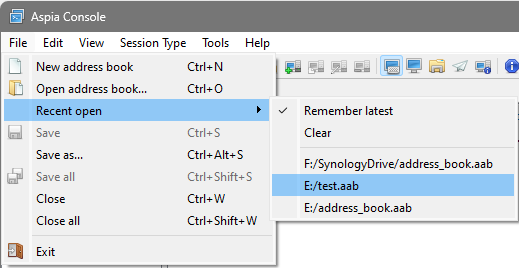
Address books open in the Aspia Console and are tabs. You can create multiple address books and open them simultaneously.
To simplify the opening of address books, a list of recent open address books is maintained:
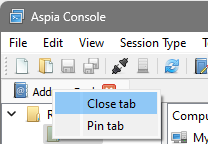
You can also use the option to “pin” tabs with address books. To do this, click on the tab title with the right mouse button and select “Pin tab”. Pinned tabs will automatically open when the application starts.
4. Computer groups
To make it easier to find the necessary computers (if there are many of them), it is possible to group them into computer groups. Computer groups can be nested and have an unlimited number of child computers and computer groups.
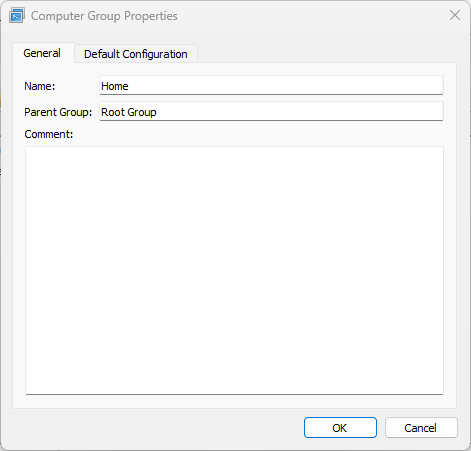
On the “General” tab in computer properties, you can specify the name of the computer group and leave a comment. The comment can contain free text (for example, your notes regarding a group of computers).
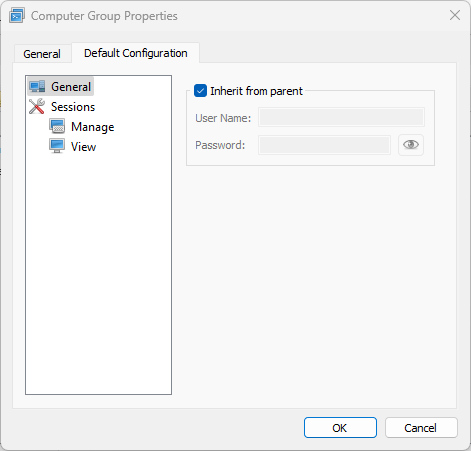
On the “Default Configuration” tab, you can specify the parameters that will be used for connection by child computers in this group (if inheritance from the parent group is enabled for these computers).
If the “Inherit from parent” checkboxes are checked, then the parameters inherited from the parent group of computers or address book will be used.
5. Computers
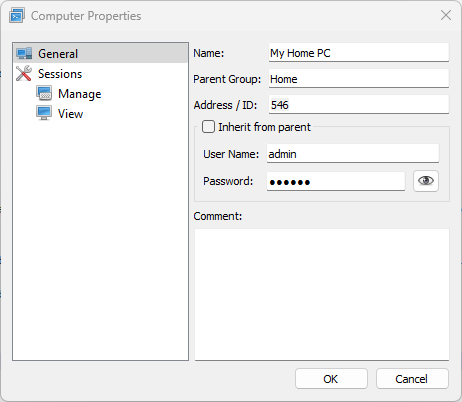
To create or change computer properties, there is a computer properties dialog. In this dialog you can change connection parameters. Connection credentials and settings for desktop manageme and view sessions can be inherited from the parent group or address book if the “Inherit from parent” checkboxes are set.
The Name field specifies the display name of the computer that you will see in the address book.
In the Address/ID field you must specify the domain name, address (IPv4 or IPv6) or ID (if you are using Aspia Router). If it is necessary to specify a port, it is indicated using a colon character.
Examples of correct address input:
IPv4 (without port)
  192.168.1.10

IPv4 (with port)
  192.168.1.10:8000

IPv6 (without port)
  [2001:0db8:11a3:09d7:1f34:8a2e:07a0:765d]

IPv6 (with port)
  [2001:0db8:11a3:09d7:1f34:8a2e:07a0:765d]:8080

Computer or domain name (without port)
  home-pc

Computer or domain name (with port)
  home-pc:8080
In the Comment field you can enter any text (for example, your notes for this computer).
6. Import and export
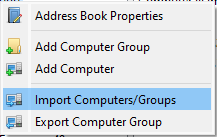
Import and export is used to quickly populate an address book initially or transfer groups of computers between address books. To do this, right-click over any of the computer groups (if no groups were added, then over the root group).
Import is available for json files exported in Router Management or json files previously exported from the address book.
7. Online check
To check computers online, there is an automatic check function. To check, go to the group of computers you are interested in and click F5 (or the update button on the toolbar). The progress of the scan will be displayed in the status bar, and information about the state of the computer (online or offline) will appear in the “Status” column in the list of computers.
8. Fast connect
A quick connection is used if you need to connect to a computer one-time without adding it to your address book.

9. Router manage
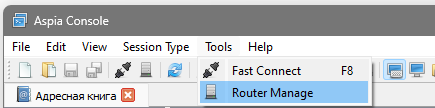
To manage Aspia Router, go to the main menu Tools -> Router Manage (to do this, you must specify the parameters for connecting to the Router in the address book properties).
9.1. Hosts tab
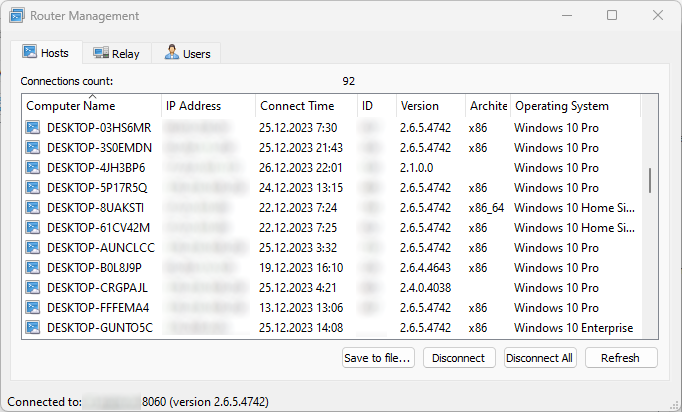
On the “Hosts” tab, you can view the list of hosts that are currently connected to the Router. For each Host, the following is displayed: computer name, IP address, connection time (when the Host established a connection with the Router), ID, version, Host architecture and the operating system that is used on the Host computer.
9.2. Buttons on the Hosts tab
- Save to file… - Saving the current list of Hosts to JSON file. You can import this file into any group of computers in the address book (this can help you automate the compilation of the address book).
- Disconnect - Terminating the connection with the selected Host. After pressing the button, the connection will be disconnected, but this will not prevent the Host from connecting again after some time.
- Disconnect All - Terminates connection with all Hosts in the list.
- Refresh - Forced update of the list of Hosts.
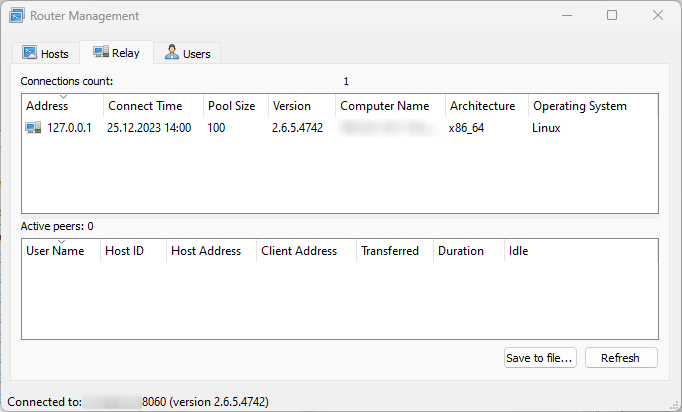
9.3. Relays tab
On the “Relays” tab you can view the list of Relays (relay servers) connected to the Router. For each Relay, the following is displayed: address, connection time (when the Relay established a connection with the Router), key pool size, versions, computer name, Relay architecture and the operating system that is used on the Relay computer.
If sending statistics is enabled in the Relay configuration, active peer sessions will be displayed in the lower list.
9.4. Buttons on the Hosts tab
- Save to file… - Saving the current list of Relays to JSON file.
- Disconnect - Terminating the connection with the selected Relay. After pressing the button, the connection will be disconnected, but this will not prevent the Relay from connecting again after some time.
- Disconnect All - Terminates connection with all Relays in the list.
- Refresh - Forced update of the list of Hosts.
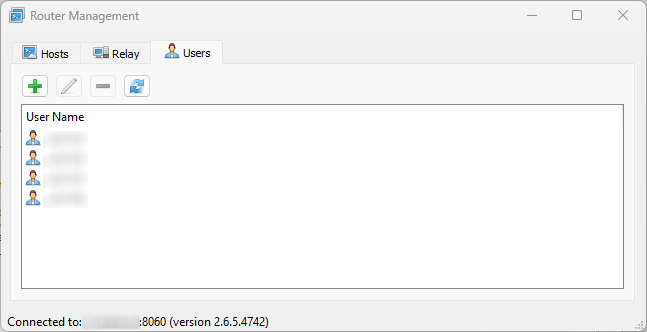
9.5. Users tab
On the “Users” tab you can manage Router users. To do this, there are buttons for adding, editing and deleting. If you need to reload the list of users from the Router, click the refresh button.
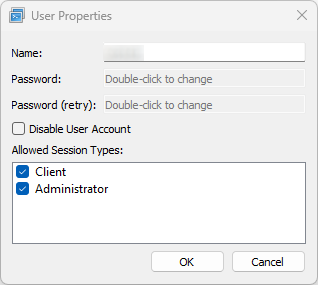
Each user can have individual access rights.
“Client” - when specifying these rights, the user will be able to connect to the Router only for subsequent connection to the Hosts. The connection to manage the Router will be unavailable.
“Administrator” - when specifying these rights, the user will be able to connect to the Router for management. Connecting to the Router for subsequent connection to Hosts is not available.
If you simultaneously specify the “Client” and “Administrator” rights, the user will be able to connect to Hosts and manage the Router. It is recommended not to use users with Administrator access rights on a daily basis. Create a separate user to administer the Router and separate users to manage the Hosts.
10. Hot keys
| Key combination | Description |
|---|---|
| Ctrl+N | Creating a new address book |
| Ctrl+O | Opening the address book file |
| Ctrl+S | Saving an address book file |
| Ctrl+Alt+S | Save address book as … |
| Ctrl+Shift+S | Save all address books |
| Ctrl+W | Close address book |
| Ctrl+Shift+W | Close all address books |
| Alt+F4 | Exit application |
| F1 | Call online help |
| Insert | Adding a group of computers or a computer (depending on the current input focus) |
| F2 | Change group of computers or computer (depending on the current input focus) |
| Delete | Delete a computer group or computer (depending on the current input focus) |
| Enter | Connect to computer |
| F5 | Checking computers online |
| F8 | Fast connect |
11. Command Line
| Argument | Description |
|---|---|
-? -h --help |
Displays help on command line options. |
-v -version |
Displays version information. |
<address_book_file.aab> |
Address book file to open. |
12. Environment variables
- ASPIA_NO_VERIFY_TLS_PEER - If the variable is declared, then the validity of the TLS certificate is not checked when checking for updates. It is not recommended to declare this variable unnecessarily. Declaring this variable can help solve the problem with checking for updates in Windows 7/2008R2, where root certificates are not updated.
13. Logs
To configure the Router logging parameters, use the following recommendations:
- To set the log level, declare an environment variable ASPIA_LOG_LEVEL with a value from 0 to 2. Decreasing the value increases the number of messages in the log.
- To enable logging to a file (if it is not enabled by default for platform), declare environment variable ASPIA_LOG_TO_FILE with a value other than 0. If the environment variable is declared with a value of 0, then logging to file will be disabled.
- To enable logging to stdout (if it is not enabled by default for platform), declare environment variable ASPIA_LOG_TO_STDOUT with a value other than 0. If the environment variable is declared with a value of 0, then logging to stdout will be disabled.
- Log files can have a limited size and after reaching the maximum file size a new log file will be created. By default, the maximum log file size is limited to 2 MB. If you need to change this size, then declare environment variable ASPIA_MAX_LOG_FILE_SIZE with a numeric value in bytes. The variable can take a value from 1024 (1 KB) to 10485760 (10 MB).
- By default, log files older than 14 days are automatically deleted. If you want to change this value, then declare environment variable ASPIA_MAX_LOG_FILE_AGE with a numeric value in days. The variable can take a value from 0 to 366. If the variable is set to 0, then the log files will not be automatically deleted.
The log file for Windows is located in the following path:
C:\Users\<user_name>\AppData\Local\Temp\aspia\aspia_console-*.log
For Linux and MacOS:
Logs are written to the terminal.